Waterproofing Your Basement to Prevent Flooding
Nobody wants a wet basement. It’s a real headache, causing all sorts of problems like mold and ruined stuff. We’ve put together some simple ways to keep your basement dry and your home safe. It’s all about stopping water before it gets in, and we’ll show you how.
Key Takeaways
- Check your basement for cracks and wet spots often. Knowing where water gets in is the first step to fixing it.
- Fixing things inside, like sealing walls and putting in drains, can stop water that sneaks past the outside defenses.
- Don’t forget the outside! Good yard drainage and proper roof waterproofing solutions are super important for keeping water away from your house.
Assessing Your Basement’s Vulnerability
Before we start throwing money at waterproofing solutions, it’s smart to figure out where the water is actually coming from. We need to play detective and understand our basement’s weaknesses. It’s not always obvious, and sometimes the problem is a combination of factors. Let’s get to it.
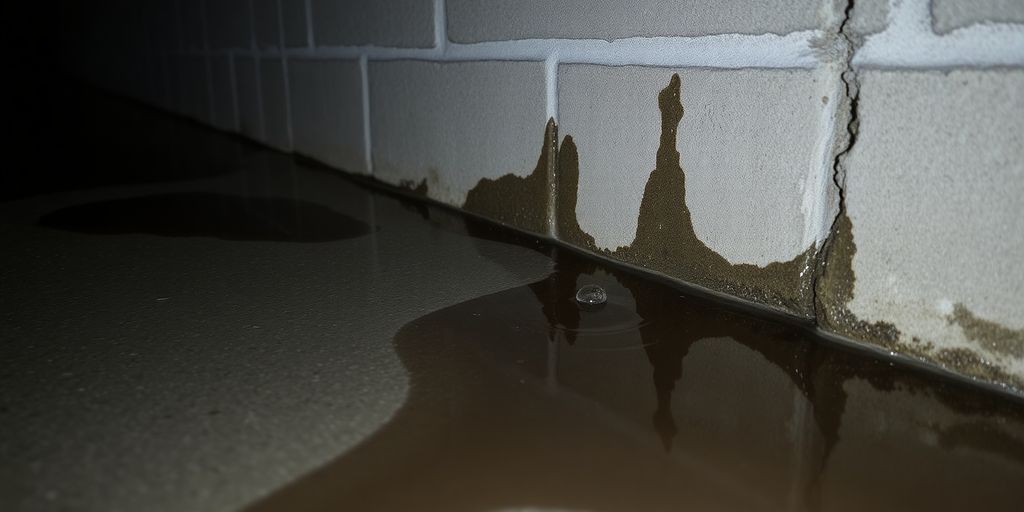
Identifying Common Entry Points for Water
Okay, so where does water usually sneak into basements? Cracks are the obvious culprit, but there are other sneaky spots too. We’re talking about:
- Foundation cracks: These can be hairline fractures or bigger, more obvious cracks. Even small ones can let in a surprising amount of water over time.
- Wall-floor joints: This is where the basement wall meets the floor. It’s a common spot for leaks because it’s a natural seam.
- Around windows and doors: If your basement has windows or a walkout door, check the seals around them. Old or damaged seals can let water seep in.
- Tie rod holes: These are small holes left over from when the foundation was poured. They’re usually plugged, but the plugs can fail.
We need to grab a flashlight and really inspect these areas closely. Look for dampness, water stains, or even mold. These are all clues that water is getting in.
Evaluating Existing Drainage Systems
Does your house even have a drainage system? If it does, is it working properly? These are important questions. A lot of older homes have inadequate or failing drainage, which can lead to serious water problems. Here’s what we need to check:
- Gutters and downspouts: Are they clean and free of debris? Are they directing water away from the foundation? Clogged gutters can cause water to overflow and pool around the base of the house.
- Grading: Is the ground sloping away from the foundation? If it’s sloping towards the house, water will naturally flow towards the basement walls.
- Sump pump: If you have a sump pump, make sure it’s working. Test it by pouring water into the sump pit to see if it kicks on. If it doesn’t, you might need to repair or replace it.
- Exterior drains: Some homes have exterior drains around the foundation. Check to see if they’re clear and functioning properly.
A properly functioning drainage system is our first line of defense against basement flooding. If it’s not up to par, we’re fighting an uphill battle.
We should also consider the type of soil around our foundation. Clay soil, for example, doesn’t drain well and can hold water against the foundation walls. This can increase the risk of leaks and water damage. Understanding our soil type can help us choose the right waterproofing solutions.
Implementing Effective Interior Waterproofing
Okay, so we’ve looked at where water might be getting in and how your current setup is (or isn’t) handling it. Now, let’s talk about what we can actually do inside to keep that water out. Interior waterproofing is all about creating a barrier and managing any water that does manage to sneak in. It’s not always the prettiest solution, but it can be super effective, especially when combined with exterior work.
Sealing Cracks and Gaps in Foundation Walls
First things first: those cracks. Even hairline fractures can let in a surprising amount of water over time. The key here is to use the right materials and prep the surface properly.
Here’s a basic rundown:
- Clean the crack: Use a wire brush to remove any loose debris, dirt, or old paint. A vacuum can help get the really stubborn stuff out.
- Widen the crack (if needed): For larger cracks, you might need to use a chisel or grinder to create a wider, V-shaped groove. This gives the sealant more surface area to grip.
- Apply sealant: Use a high-quality concrete crack sealant or epoxy injection. Follow the manufacturer’s instructions carefully. For larger cracks, you might need to use backer rod to fill the bulk of the space before applying the sealant.
- Smooth and cure: Use a putty knife to smooth the sealant and allow it to cure completely before painting or covering it.
It’s important to remember that sealing cracks is often a temporary fix. If the cracks are caused by structural issues, they’ll likely reappear. In that case, you’ll need to address the underlying problem.
Installing Interior Drainage Systems
Sometimes, no matter how well you seal things, water will still find a way in. That’s where interior drainage systems come in. These systems are designed to collect water that seeps through the walls and direct it to a sump pump, which then pumps it away from your foundation. It’s like admitting defeat, but in a smart, controlled way.
There are a few different types of interior drainage systems, but the most common is a perimeter drain. This involves:
- Jackhammering a trench around the perimeter of your basement floor.
- Installing a perforated pipe in the trench.
- Covering the pipe with gravel.
- Covering the gravel with concrete.
The pipe then connects to a sump pump, which is installed in a pit in the floor. When water accumulates in the pit, the pump automatically turns on and discharges the water outside. It’s not a fun job, but it can make a huge difference in keeping your basement dry. The cost can vary quite a bit depending on the size of your basement and the complexity of the installation, but expect to pay several thousand dollars. It’s a good idea to get quotes from multiple contractors before making a decision.
Here’s a quick comparison of different interior drainage options:
| System Type | Cost | Effectiveness | Installation Difficulty | Maintenance |
|---|---|---|---|---|
| Perimeter Drain | $$$ | High | High | Low |
| Baseboard System | $$ | Medium | Medium | Medium |
| Water Collection Mat | $ | Low | Low | High |
Fortifying Your Home’s Exterior Against Water
While interior waterproofing methods are important, addressing the source of the water intrusion from the outside is often the most effective long-term solution. We need to think about how water flows around our homes and take steps to redirect it away from the foundation. This involves a few key areas, from the slope of our yards to the coatings we apply to the foundation itself. Let’s get started.
Improving Exterior Grading and Landscaping
One of the simplest, yet most effective, things we can do is to make sure the ground slopes away from our foundation. Ideally, the ground should slope down at least six inches over the first ten feet away from the house. This helps to naturally channel water away. If we have areas where water tends to pool near the foundation, we might need to add soil to create a better slope.
- Check for low spots near the foundation after heavy rains.
- Consider adding swales or drainage ditches to redirect water flow.
- Ensure downspouts extend far enough away from the house (at least 4-6 feet).
We also need to think about our landscaping. Plants too close to the foundation can trap moisture and prevent proper drainage. It’s a good idea to keep plants trimmed back and avoid planting anything that requires a lot of water right next to the house. Mulch can also retain moisture, so we should use it sparingly near the foundation.
Considering Exterior Foundation Coatings and roof waterproofing solutions
For added protection, we can consider applying a waterproof coating to the exterior of our foundation walls. This is especially helpful if we have an older home with a porous foundation. There are several types of coatings available, including liquid rubber and cementitious coatings. We need to make sure to properly prepare the surface before applying any coating, which usually involves cleaning and patching any cracks or holes. Also, don’t forget about the roof! A leaky roof can contribute to basement dampness, so ensuring its waterproof is a must.
| Coating Type | Pros | Cons |
|---|---|---|
| Liquid Rubber | Flexible, good for crack bridging, durable. | Can be more expensive, requires careful application. |
| Cementitious | Relatively inexpensive, easy to apply. | Less flexible, may crack over time. |
| Bituminous | Good waterproofing properties, resistant to chemicals. | Can be brittle, may degrade in sunlight. |
Here are some things to keep in mind:
- Clean the foundation thoroughly before applying any coating.
- Repair any cracks or holes in the foundation.
- Apply the coating according to the manufacturer’s instructions.
Wrapping Things Up
So, we’ve gone over a bunch of ways to keep your basement dry. It might seem like a lot to take in, but taking steps to waterproof your home really pays off. Nobody wants to deal with a flooded basement, right? It’s a huge headache and can cost a ton of money to fix. By putting some of these ideas into practice, you’re not just protecting your stuff; you’re also making your home a safer, more comfortable place. Think of it as an investment in peace of mind. We hope this helps you get started on keeping that basement nice and dry.
Frequently Asked Questions
How long does it usually take to waterproof a basement?
The time it takes to waterproof a basement can change a lot. It depends on how big your basement is and how bad the water problems are. A small job, like fixing a few cracks, might only take a day or two. But if we need to put in a whole new drainage system, it could take a week or even longer. We always work hard to get the job done right and as quickly as possible, without cutting corners.
How much does it cost to waterproof a basement?
The cost of waterproofing a basement can be different for everyone. It depends on what kind of work needs to be done. Simple fixes are cheaper, while big projects like putting in new pipes or coatings cost more. We always give you a clear price upfront after we look at your basement, so you know what to expect. Our goal is to give you good value for your money and a dry basement.
What should we do after the basement is waterproofed to keep it dry?
After we waterproof your basement, you should still do a few things to keep it dry. It’s a good idea to check your gutters to make sure they’re clean and that water is flowing away from your house. Also, make sure the ground around your house slopes away from the foundation. These simple steps can help a lot in keeping your basement free from water for a long time after our work is done.